Configure the Import Relationships Plugin
The Import Relationships Plugin helps you batch create relationships between existing items in the application.
Note
You must have organization admin permissions to complete this task.
Important considerations
Before you use the Import Relationships Plugin in Jama Connect, you must first create a direct relationship between the items you plan to link. Otherwise, the linking might fail. For example, when you link use case item types to test case item types, you must first define a relationship rule for that project. For more information, see Set up relationship rules.
To configure the plugin:
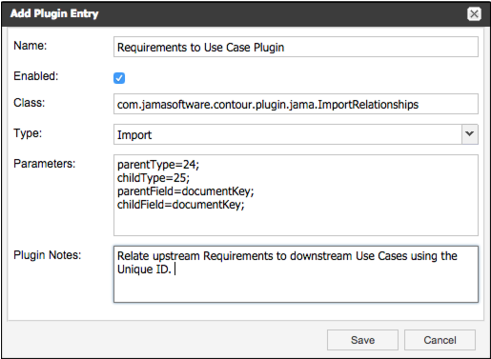
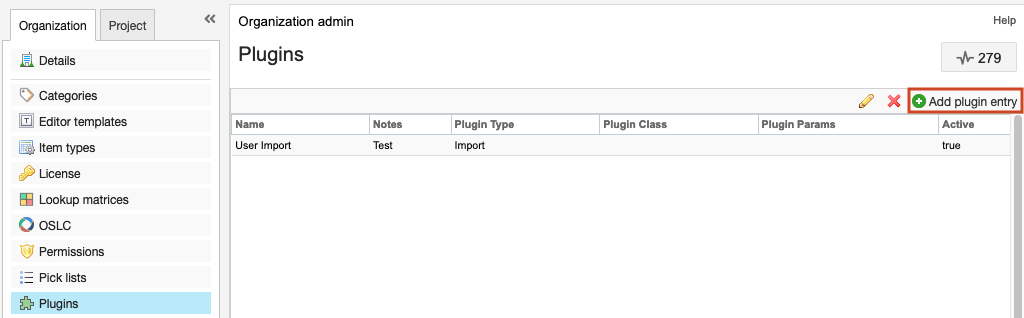
Select Admin > Organization, then select Plugins > Add plugin entry.
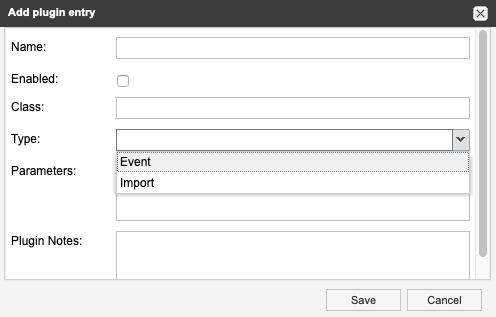
In the Add plugin entry window that opens, enter the following information and click Save.
Name — Enter a name you visible to users. For example, Import Relationships.
Enabled — Make the plugin available to users.
Class (case sensitive) — Enter the name of the object defined in the source code.
For a single project enter:
com.jamasoftware.contour.plugin.jama.ImportRelationships
For cross-project imports enter:
com.jamasoftware.contour.plugin.jama.ImportRelationshipsCrossProject
Type — Import
Parameters — Set relationship parameters
Plugin notes — Add any notes you have here. This isn't visible to end users.
When the information is correct, click Save.
Note
For a sample entry of a cross-project import, see Set relationship parameters.