Configure the User Import Plugin
With the User Import Plugin, you can add multiple users at once by importing a spreadsheet. Imports don't delete users from Jama Connect.
Organization Admins only
You need organization admin permissions for this task.
If the import fails it might be because:
A user that already exists was set to add (rather than update).
A user that doesn't exist was set to update (rather than add).
One or more of the records is incorrect.
A required field was missing.
To configure the plugin:
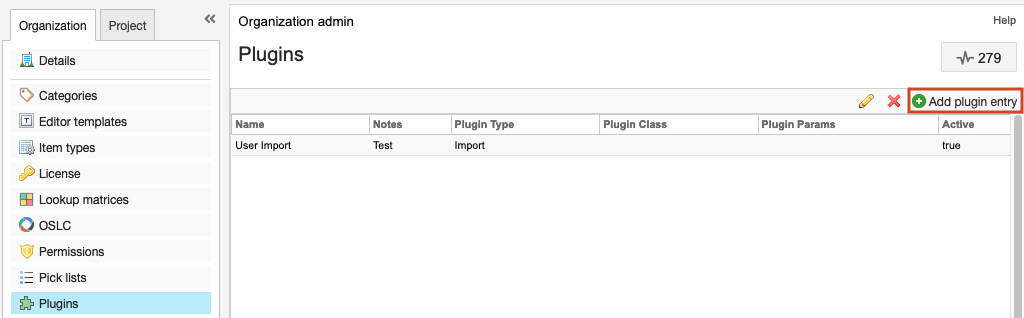
Select ADMIN > Organization, then select Plugins > Add plugin entry.
In the Add plugin entry window that opens, enter the following information and select Save.
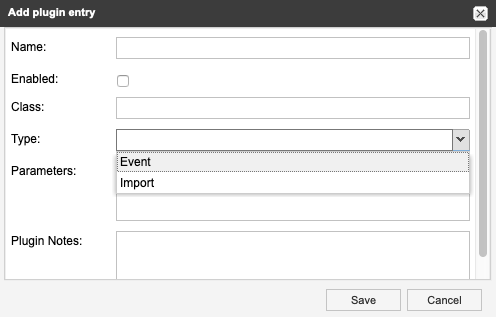
Name — User Import
Enabled —Make the plugin available to users
Class (case-sensitive) — Enter the name of the object defined in the source code:
com.jamasoftware.contour.plugin.jama.UserImportPlugin
Type — Event or Import
Parameters — Leave this field blank
Plugin Notes — Add any notes you have here. This isn't visible to the end user.
Create a CSV document with no header row that contains the following values in columns A through K:
Username — If LDAP or CROWD is enabled, the username must match what is listed in the directory.
First name
Last name
Email
Password
Title
Location
Phone number
License type — Values must be one of the following:
Value
Meaning
N
Named creator
C
Float creator
FC
Float collaborator
S
Stakeholder
R
Reserved collaborator
V
Float reviewer
RV
Reserved reviewer
NV
Named reviewer
TR
Test runner
Add/Update — Values must be one of the following:
Value
Meaning
Add
Add as a new user
Update
Update an existing user
Company
Groups — If a user belongs to multiple groups you can add them in columns L and up.
For example:

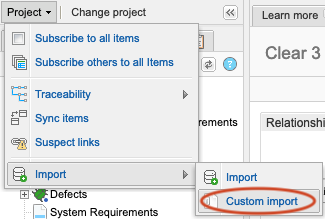
Select Project > Import > Custom import.
In the Custom Import window that opens, enter the following information:
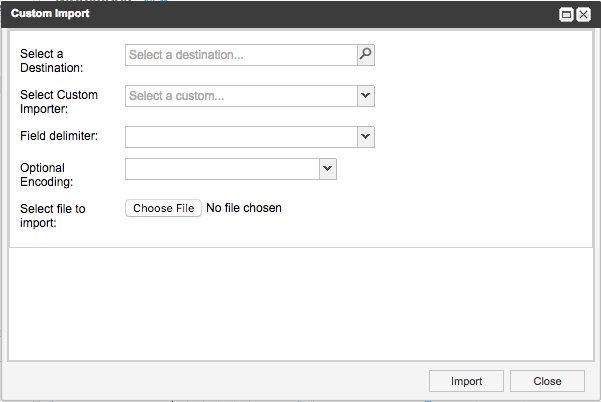
Select a destination — This is a required field. Your selection doesn't affect the outcome.
Select Custom Importer — User Import
Field Delimiter — Comma
Optional Encoding — UTF8
Select file to import — Choose the CSV file you created in step 3, that contains the list of users to be imported.
Select Import.
Each user that's added with the user import plugin receives a welcome email with the Jama Connect URL.