Set up relationship rules
Relationship rules help maintain the project structure by preventing problems with relationships. The rules help users know when relationships are required and in which directions.
Note
You must have organization admin permissions to complete this task.
When relationship rules are set up, the Relationship Status Indicator alerts users when their relationships don't match the relationship rules.
Rule sets are created at the organization level, and can then be applied to one or more projects.
To set up relationship rules:
Decide with your team which relationships to include, the relationship types, and whether the rules are exclusive and included in coverage calculations for the project.
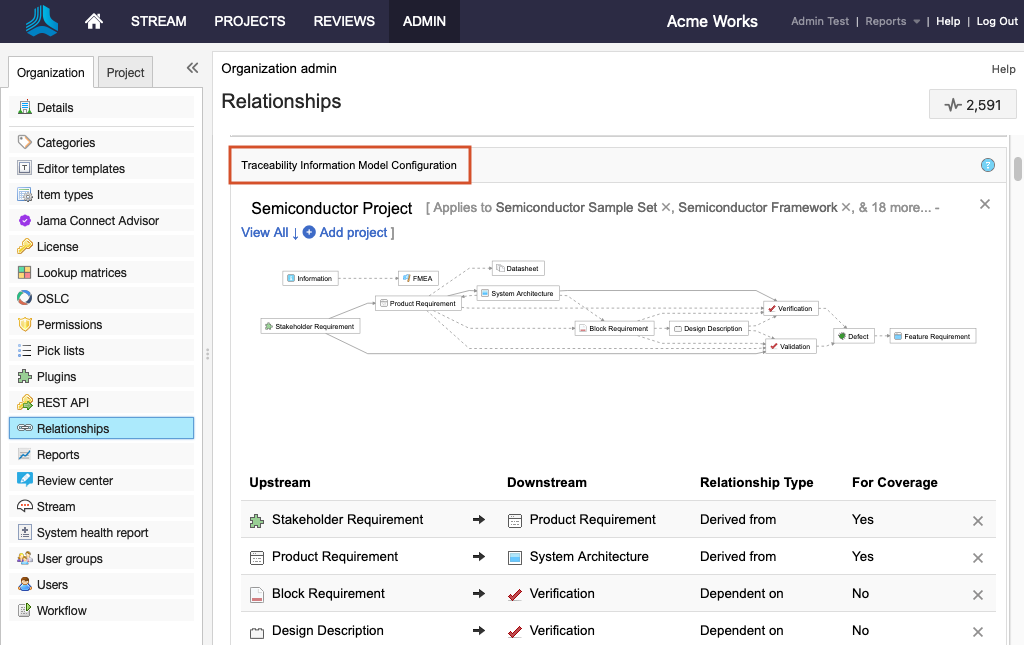
Select ADMIN > Organization > Relationships and scroll down to the section labeled Traceability Information Model Configuration to see any previously created rule sets.
Scroll to the bottom and select Add rule set.
Select New Rule Set and edit the name to describe your set.
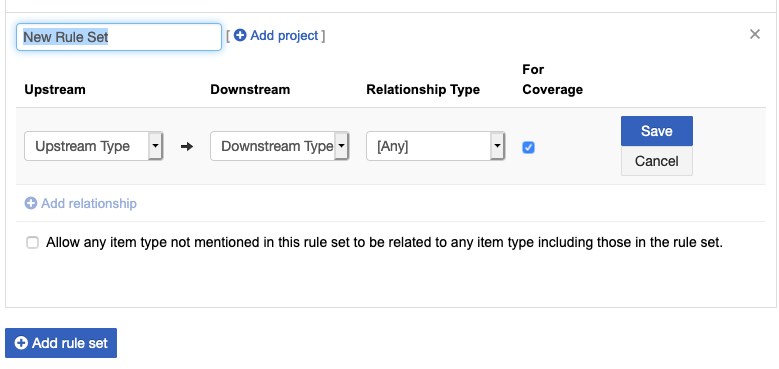
Add a rule by selecting the item type for Upstream, Downstream, and Relationship type from the drop-down menus. Select For coverage if you want this relationship included for coverage.
Note
Configure the same rule set across projects that share relationships. If you relate items across projects with different rule sets, the source project's rule set is applied.
Select Save.
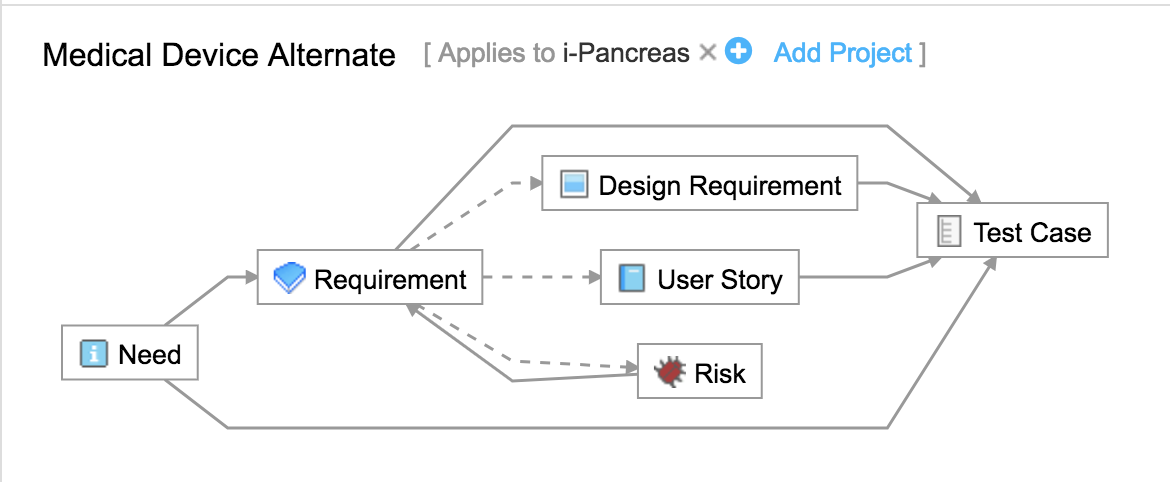
As the rule is saved, it is added to the diagram, indicating the relationship.
(Optional) Select Add another relationship to include another relationship for this rule set.
As rules are created, the diagram is updated to show the relationships. Solid lines between items indicate a coverage (required) relationship. Dashed lines indicate relationships that aren't for coverage.
Note
Once you set relationship rules for a project, you can also view the relationship rules diagram in Single Item View or on the dashboard.
To delete a rule, select the X at the end of the rule's row. To delete an entire rule set, select the X at the top right of the rule set. After editing or deleting a rule, the rule set diagram is updated with any changes made.
Select Add project to apply the rule set to one or more projects. If a rule set is applied to a project with existing items, nothing changes in that project, even if the existing relationships break the new rules. Only future relationships are required to conform with the rule set.
Important
A project can have only one rule set. If a rule set has already been applied to a project and you try to apply another, the application removes the first rule set from the project and applies the second one.
(Optional) Select Allow any item type not mentioned in this rule set... to allow users to create relationships outside the rule set you applied to the project.
Rules are between item types. If you don't define a rule for a particular item type, that item type can have a relationship with anything (or nothing if the user chooses), even if the rule set is exclusive.