Exploring the Jama Connect workspace
The Jama Connect workspace is where you set up and manage your projects, create test plans, communicate with your team, track relationships, and more.
The workspace is divided into five distinct panels that you can expand, collapse, and resize.
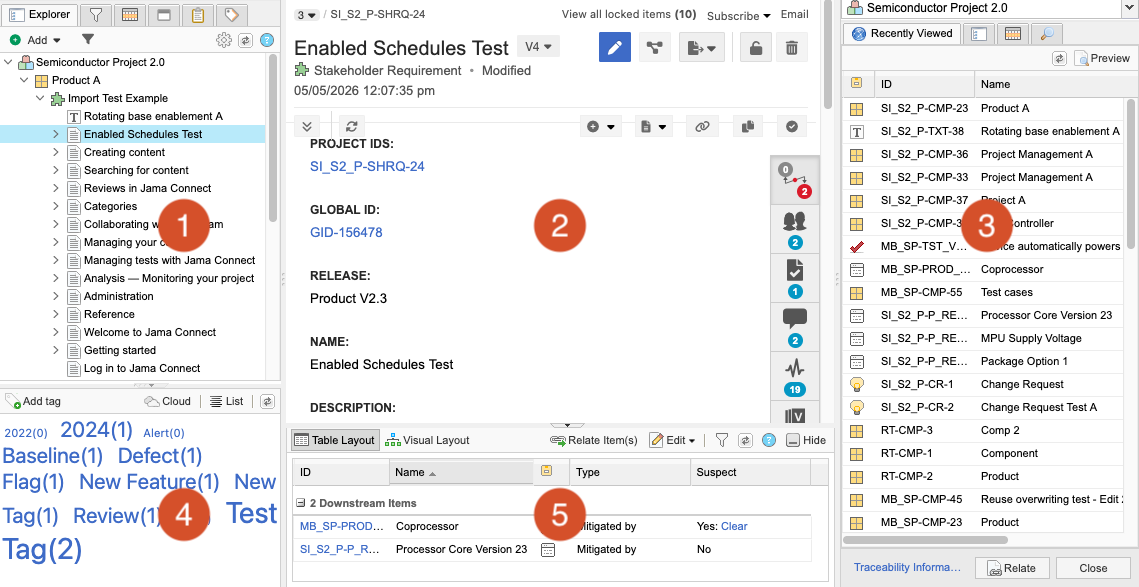
Explorer Tree — Manage projects by selecting the tabs at the top of the left panel, called the Explorer Tree, to expand these views: Explorer, Filters, Releases, Baselines, and Test Plans.
Center details panel — View the details for specific items. Content from Components, Sets, Folders, Filters, and individual items are displayed in this panel.
Related Items panel — Add relationships between items for traceability or add items to a change request. Open this section from the Relationships tab and close it when it's not needed.
Project side panel (Tag Cloud) — Use keywords to group items for easy navigation to those items.
Item information panel — Manage item information associated with comments, relationships, attachments, versions, and activities.
Jama Connect is highly configurable, so you can customize the workflow to work best for you. For example, focus on creating requirements from the Explorer Tree, view details about a test case, or explore the relationship between items. Depending on the task or goal, you might interact with one area or all areas of the workspace.
For an overview and tour of the Jama Connect workspace, see Tutorial: Overview and Navigation.