Add test cases to a plan
Once you create test cases, you can add them to a plan in groups. For example, you might group all the cases for a specific aspect of the product, for a test location, or for a specific tester.
You can only add a test case to one group in a test plan because a test case can appear in a test plan only once.
To add a test case to a plan:
In the left panel, select the Test Plans tab and the name of the plan where you want to add the test cases.
In the toolbar of the center panel, select Test groups for that plan.
The right panel shows the tree for your project.
Note
If you select a different project in the project selector drop-down menu, the right panel displays the tree for the selected project.
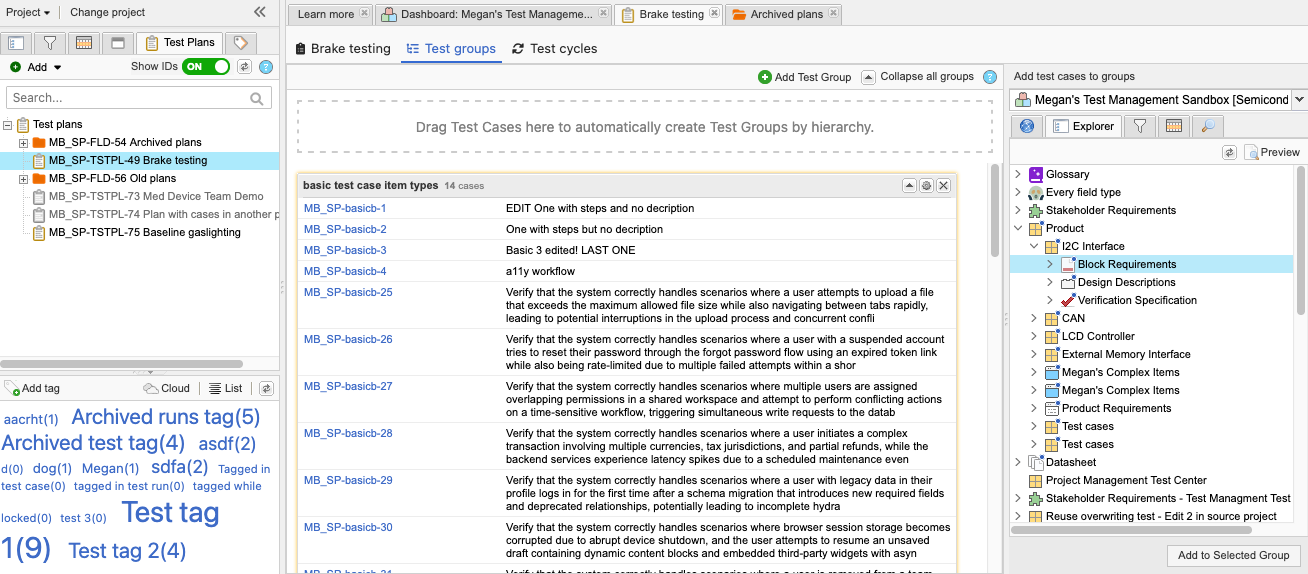
To add test cases to an existing group: Select any component, set, or folder of test cases, or an individual test case from the plan's tree on the right, then drag it to an existing group.
You can also select the Releases, Filters, or Search tabs to find the test cases you want to add.
To create a new group based on the Explorer Tree hierarchy: Drag the component, set, or folder that contains test cases to the dashed line box at the top of the center pane. The hierarchy is used to generate groups with test cases.
For example, if you drag and drop this set of test cases:
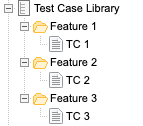
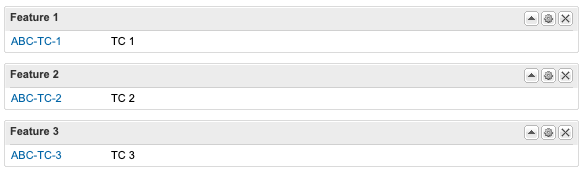
These three groups are created:
The text cases are added to the selected group.