Add and edit item types
You can create a new item type, add or delete fields in an existing item type, or change the item type details. Once an item type is created, users can add it to their project.
Organization Admins only
You need organization admin permissions for this task.
Important considerations
Changes to an item type affect that item type in all projects. Item types can't be customized for individual projects.
Jama Connect comes with a core set of item types that can't be deleted. When you select ADMIN > Organization > Item types, core item types don't include a Delete option.
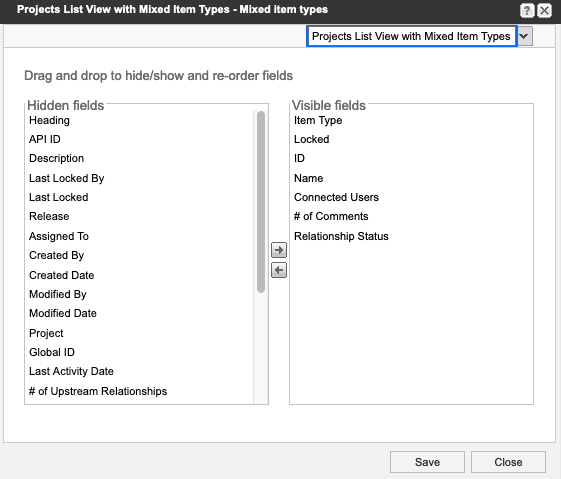
You can see a list of core item type fields in Admin > Organization > Item Types > Core > Views > Projects List View - Mixed Item Types. Custom fields can't be selected for visibility in mixed item type views.
Before a new item type can be used in a project, it must be added to that project by a project or organization admin.
Best Practice
As much as is possible, standardize your use of Jama Connect and limit the team-by-team configuration of item types. Fewer item types means easier management of the configuration, reporting by item types across projects, and standardization across the organization. When a new configuration need arises, look at how existing item types can be used across teams. However, it is also important not to over-configure a single item type with fields that might not be used by all teams.
To add or edit an item type:
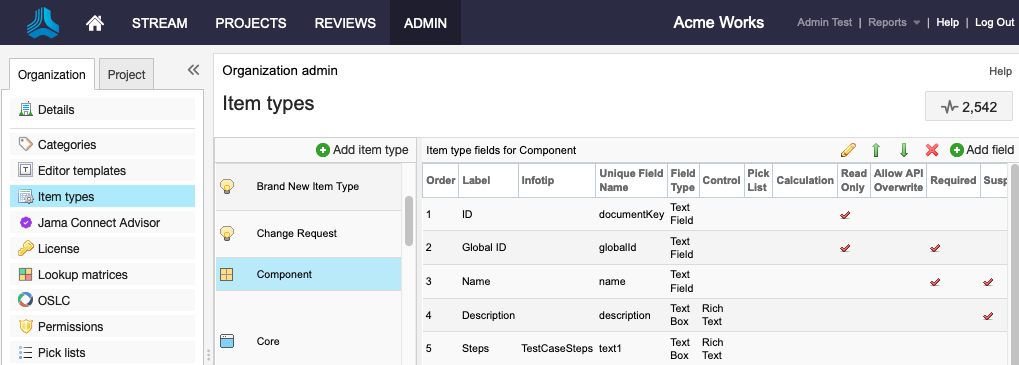
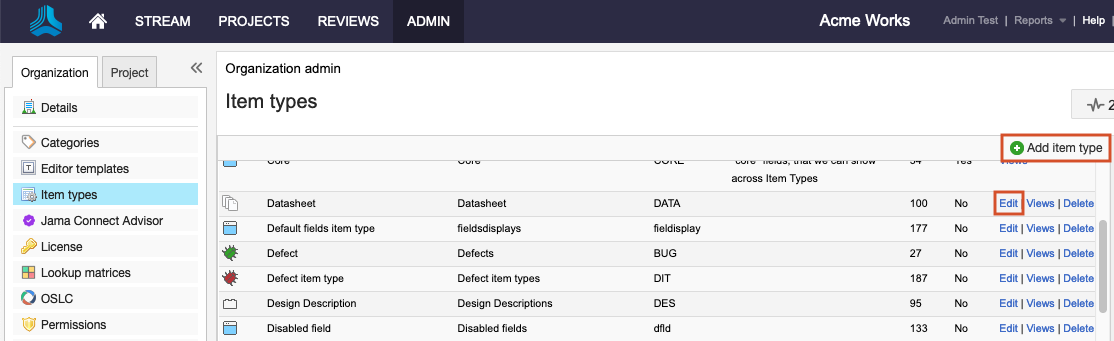
Select ADMIN > Organization, then select Item types.
Add (Add item type) or edit an existing item type (Edit next to the item type you want to modify).
In the Add item type window that opens, select or modify the following options:

Display — (Required) Name for a single item of this item type.
Display plural — (Required) Name for multiple items of this item type.
Description — Explanation for how this item type is used or how it is distinguished from other item types.
Type key — (Required) The default ID Prefix that is shown when creating a set using the item type. It can be overwritten.
Use as — Option if you are using this item type for special use for test. (If you're using the REST API to create an item type, it refers to this as a Category).
Widgets — Small embedded applications that add functionality to item types. Read more about widgets or how to enable or disable them.
Image — (Required) The icon displayed for this item types. Icons are used as the set icon, the list view icon, and the icon at the upper-left of the item view.
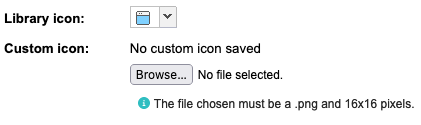
Library icon and Custom icon — (Required) The icon for the item type you're editing. Icons are used for set (container), List View, and in the upper left corner in Single Item View.
Admins can use default icons or upload their own custom 16x16 pixel icon. Custom icons can’t be reused and must be uploaded for each item type.
Note
A custom icon must be deleted by an admin to revert to a library icon.
API ID — A reference ID that is automatically assigned to an item type for API reporting purposes. You can see this ID by selecting ADMIN> Item types, but it cannot be specified or changed.
Select Save.
Your changes are saved and any new item types are now available to users.
Important
You can delete an item type but you are prompted to delete any existing items of that type before you delete it. To delete, choose the item type you want to remove and select Delete.