Create custom fields in Jama Connect
Before you can import relationships (or trace links), you must first create a new custom field in Jama Connect for each item type you're importing. Each field must contain a unique identifier.
Best Practice
When importing many custom fields from DOORS, create a common custom item type that contains all the custom fields. Use this item type only for the initial import, then later convert sets to a standardized set of item types. That way, every imported item includes legacy DOORS information in its version history. To view this information, compare versions.
To create custom fields in Jama Connect:
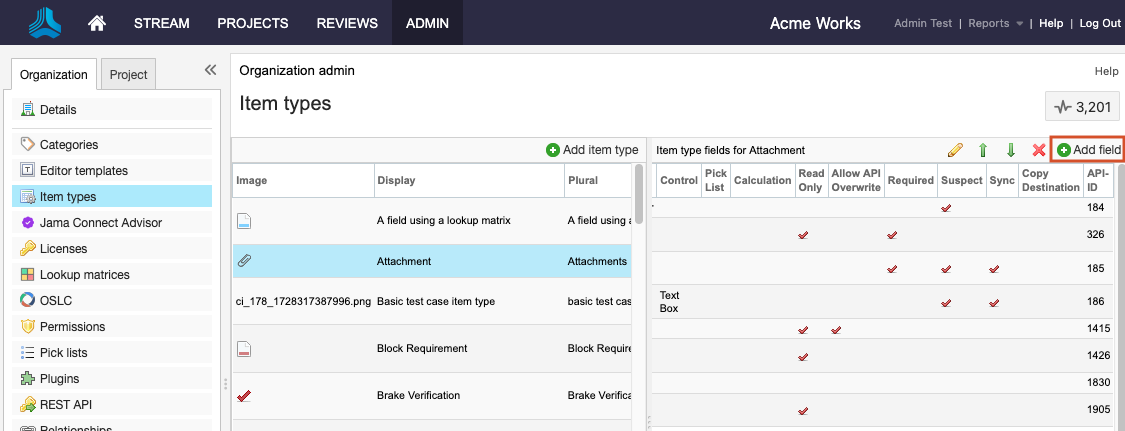
In Jama Connect, select Admin > Organization > Item types.

Find the item type you're using for the DOORS import, then select Add field.

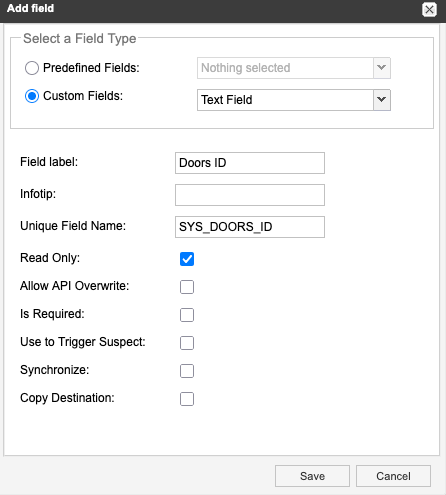
In the Add Field window, complete these options, then select Save.

Select a Field Type — Select Custom Fields, then select Text Field from the drop-down menu.
Field label — Enter a name for the field (for example, "DOORS ID").
Unique Field Name — Enter "SYS_DOORS_ID." This is case-sensitive and must exactly match the above image.
Select Read Only.
This item type can now accept relationships (trace links) imported from DOORS.

Important
The SYS_DOOR_ID field must be created for all the item types you are relating.