Create or edit an advanced filter
Filters allow you to customize the scope of a search so it’s more granular and efficient. You can create a filter or edit an existing saved filter.
Best Practice
For best search results and quality performance, make your filters as specific as possible to return only the results you need. If you run a filter against all your Jama Connect projects, the results you get might be too broad to be helpful and performance can be affected by such a large data set.
Note
Only organization admins can edit filters that they didn't create. Depending on your permissions, you might not be able to edit filters that were created by other users. To view a filter's details, select the filter name under the Filters tab and select View criteria.
To create an advanced filter:
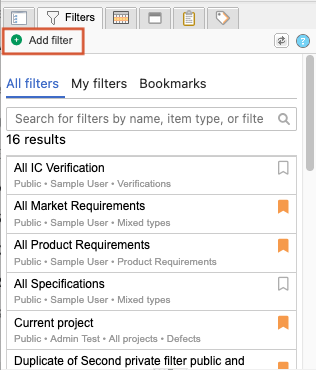
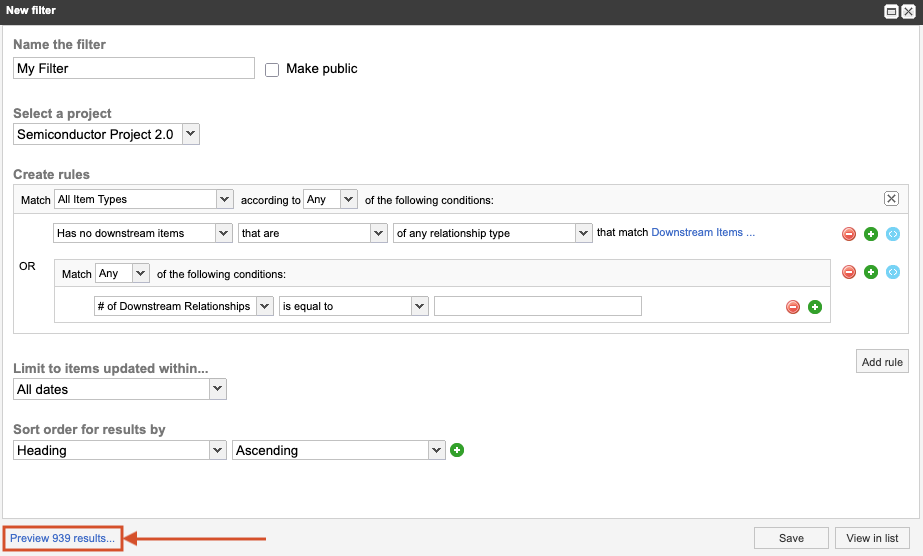
Select the Filters tab in the Explorer Tree, then select Add filter.
In the New filter window, enter a name for the filter and define the project scope:
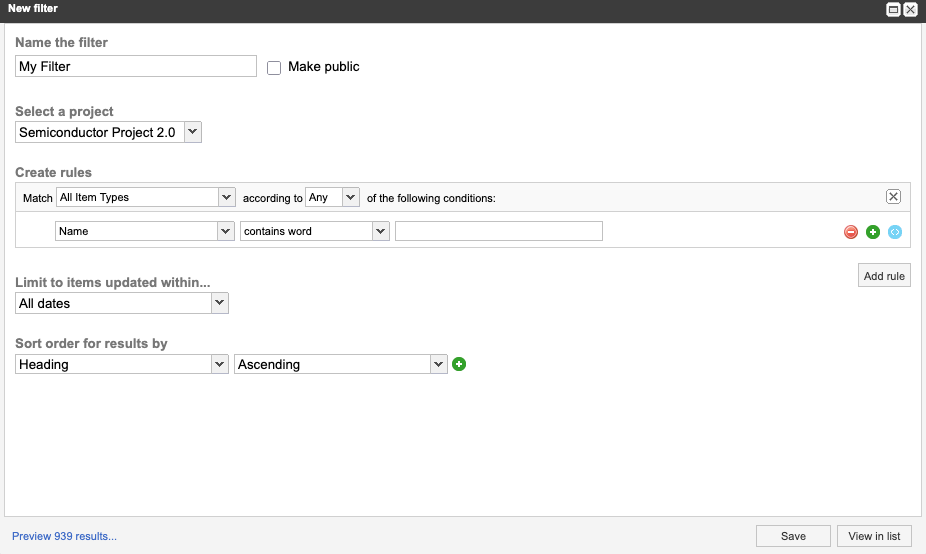
This project only — Queries data from the project you are viewing at the time. The filter appears only when using this project.
Current project — Queries data from the project you are viewing at the time but the filter is also available for other projects.
All projects — Pulls data from every project in the organization where you have permissions to view. Results include items from other projects that match the filter criteria.
(Optional) Select Make public to share the filter with anyone who has access to the project.
Define the Match option for a specific item type or All Item Types.
When you select a specific item type, you can filter by its fields. Searching for All Item Types limits your criteria to Jama Connect core fields.
Define your filter with available conditions, which depend on the selected item type.
Add rule creates a new rule. A filter can contain any number of rules.
+ adds a condition.
– removes a condition.
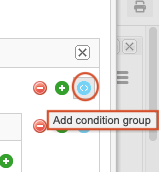
Add condition group (blue button) creates a condition group, which depends on the selected item type.
When you filter by relationships, Add embedded filter opens the Add embedded filter window, where you can add a sub-filter and configure an embedded filter to limit the related items to a specific item type.

For example, you can create a filter to identify change requests with downstream relationships and a configure an embedded filter to limit the related items to a specific item type.
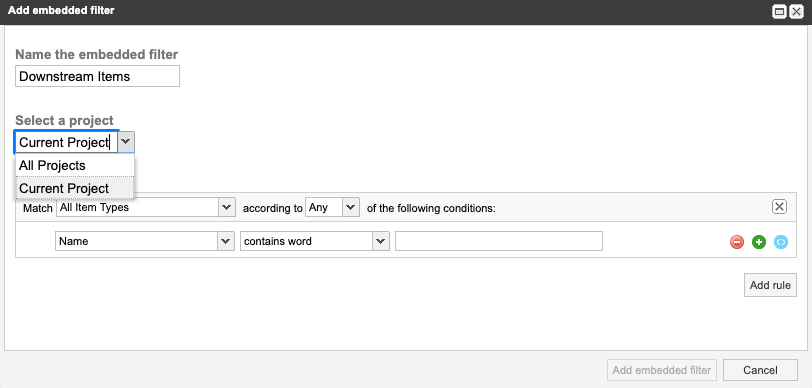
Enter a name for the embedded filter.
From the Select a project drop-down menu, select All Projects or Current Project.
In the Create rules section, add the conditions for the new embedded filter.
Select Add embedded filter.
In the New filter window that opens, define the following.
Limit to items updated within — Define a time frame when items were updated.
Sort order for results by — Define how results are sorted on output.
Select Preview <number> results... in the bottom left corner of the New filter window. Results appear in the same window.
Results example:
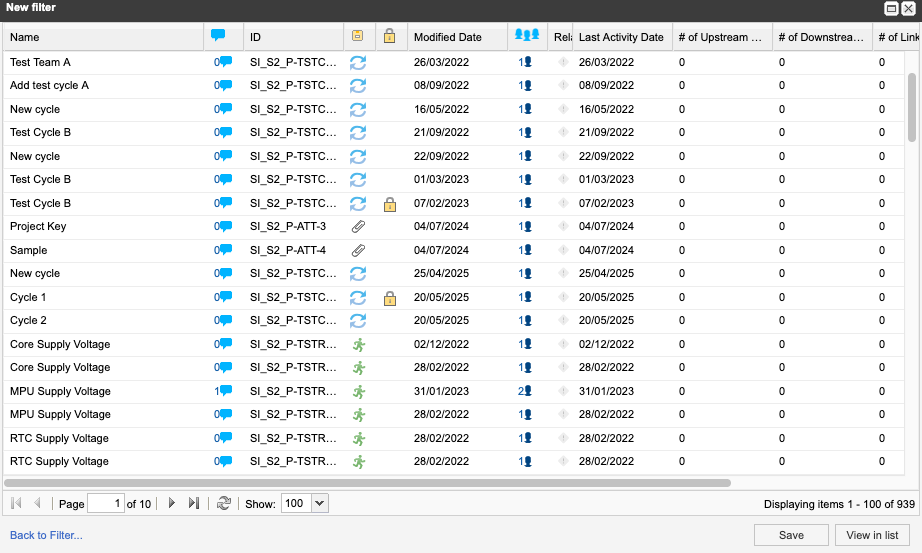
(Optional) To see the filter items in List View, select View in List.
Select Save.
The new filter is now available in the list of bookmarked filters.