Add, edit, or delete a test group
Test cases are added to a plan in groups, which makes it easier for others to understand and run your test plan. For example, you might want a group to include all the cases for a specific aspect of the product, or you might want to group by test location or tester
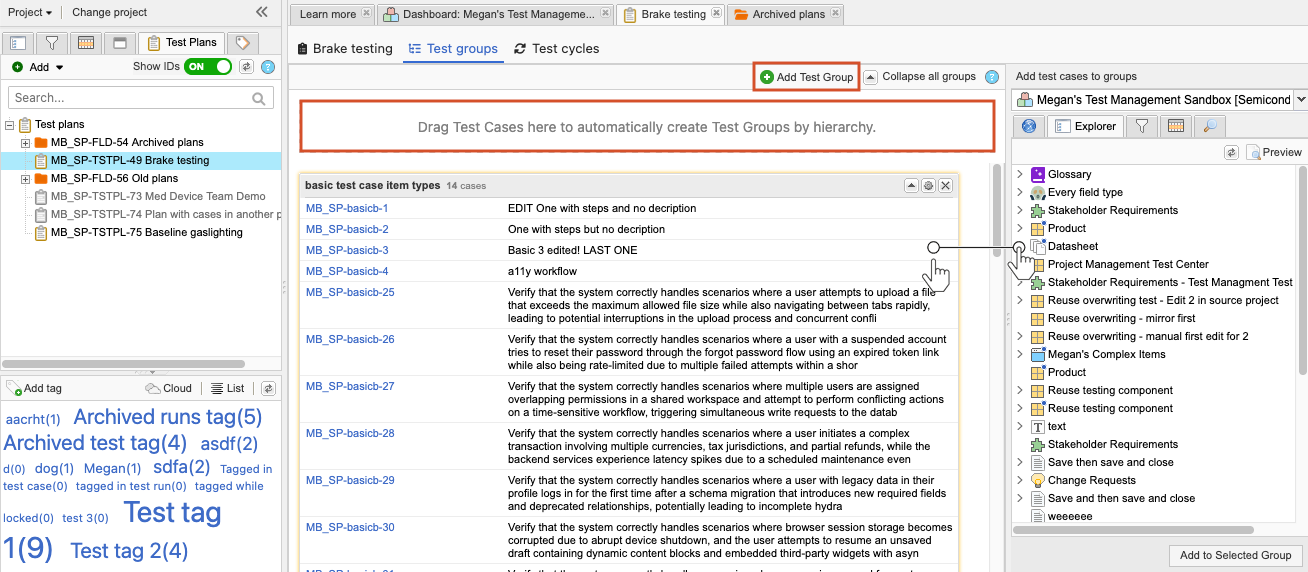
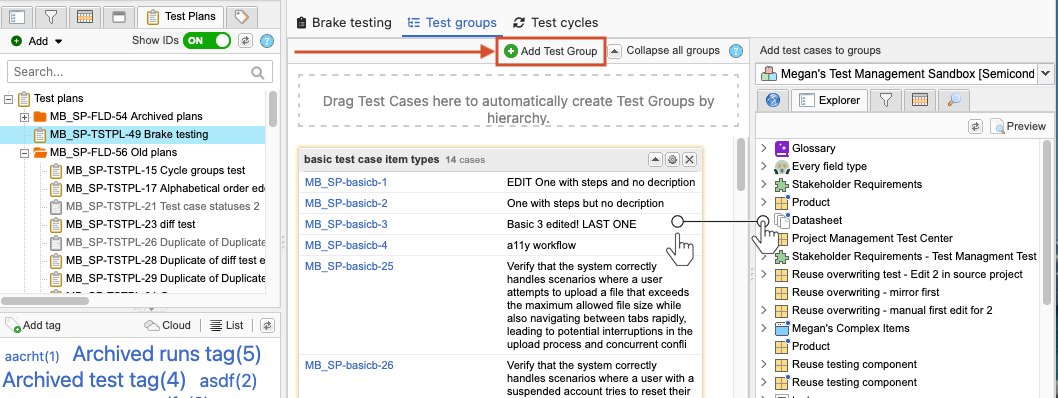
Along with the default test group, you can create a new group manually by selecting Add Test Group or automatically generate test groups by dragging test containers to the center panel. These automatic test groups inherit the name of the test case container. For example, test cases organize by folders in a set generate test groups for each folder.
Best Practice
Create a user as a placeholder for a particular team, such as "Software Team," and assign groups to that team. While this method requires an active license, it allows members of the team to see all the runs that are assigned to their team in a cycle. When you execute a run that was assigned to another user, such as "Admin Test," you can reassign that run to yourself.

Note
Test groups can't be added, removed, or altered when the test plan is locked.
To add, edit, or delete a test group:
To add a test group:
Select the Test Plans tab in the left panel, then choose the plan where you want to add a test group.
In the toolbar of the center panel, select Test Cases for the plan you want to see.
Select Add Test Group.
In the window that opens, complete these fields and select Save:
Name – Enter a name for the group.
Assigned To – Select Search (magnifying glass icon) to assign a person to run the tests in this group, then select the person's name, and choose Select User.
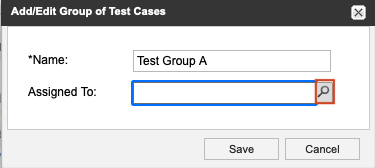
Any runs created from this group are automatically assigned to that person.
To edit an existing group:
Select the gear icon to open the Add/Edit Group of Test Cases window.
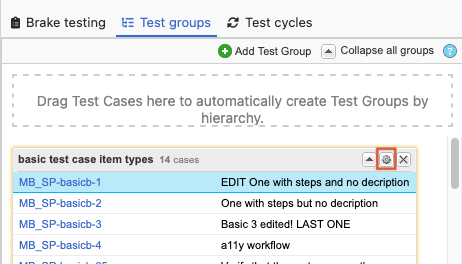
Make your changes and select Save.
To delete an existing group:
Choose the Test Group you want to delete, then select X (Delete this test group).

Select Yes to confirm.
The test group is removed from the center panel.
Select Test Cycles and review existing Test Cycles to see if there are test runs linked to the removed test group cases.
If test runs are unassigned and appear in the Not Run state, select Cycle > Edit cycle.
A wizard opens and guides you through the process. The removed test group no longer appears on the second page of the Edit Cycle wizard.
Save the Test Cycle.
The test cycle is updated and test runs removed.
Important
If the test runs were executed, then you must delete each test run from Single Item View.