Add a user
When you add one user to Jama Connect, you define the username and license type, assign the user to groups, and optionally generate an email with the account information.
Organization Admins only
You need organization admin permissions for this task.
Important considerations
If you install and configure the user import plugin, you can add multiple users at the same time.
To add a single user:
Select ADMIN > Organization, then select Users to display a list of active users.
If you don't see the user you're looking for, select View inactive users.
If LDAP is enabled, you can select Add user from LDAP and search for an existing LDAP user in the search box. Jama Connect searches LDAP against the configured "Login Name Attribute" and the "User Name Attribute."
Tip
You can add wildcards to a search, but if you add them at the beginning of a search term, they can result in slow performance. For large directories, expect the search to take several minutes.
From the toolbar, select Add user.

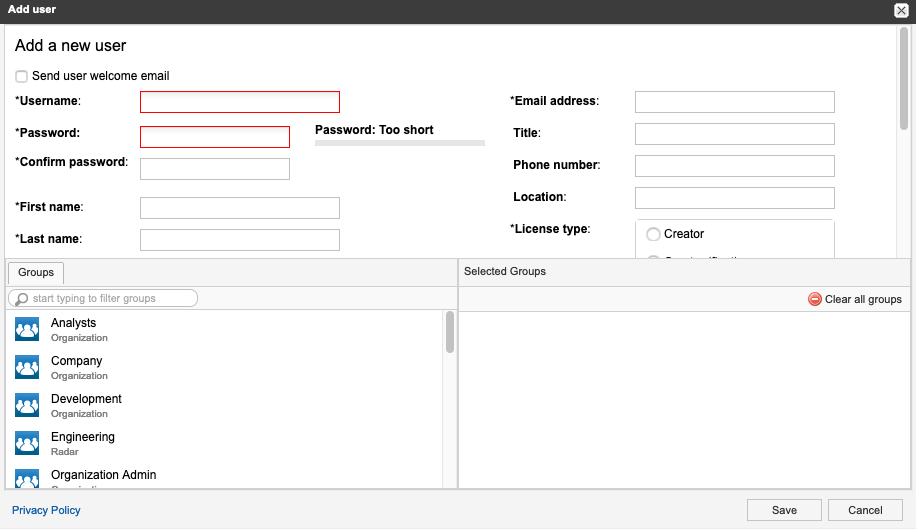
In the Add user window that opens, fill in the required fields.

Username — Enter a unique name, as in an email address (recommended).
License type — Consider the number of licenses purchased and the expected usage by the user when assigning license types.
User groups — Select the appropriate groups for this user.
Send user welcome email — (Optional) Send an email to the user with username and URL link to authenticate, allowing them to change their password.
Select Save.
The new user appears in the list of users and, if configured, receives a welcome email with username and Jama Connect URL.