Import DOORS files to Jama Connect
After you have exported data from DOORS, you can import it to Jama Connect using the Data Import Wizard, which guides you through the process.
The import process creates:
Sets or folders in an existing set. DOORS Attributes map to fields in Jama Connect.
Relationships between items only after both items are imported.
To import DOORS files:
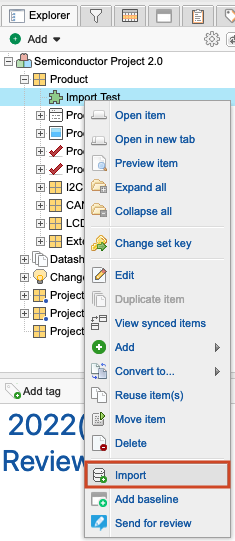
Open the Data Import Wizard: In the Explorer Tree, select an item where you want to import new items, then select Import. Your file is imported below the selected item.
The first page of the wizard opens with the Destination field pre-populated.
Complete the Select Import File and Destination page, then select Next.
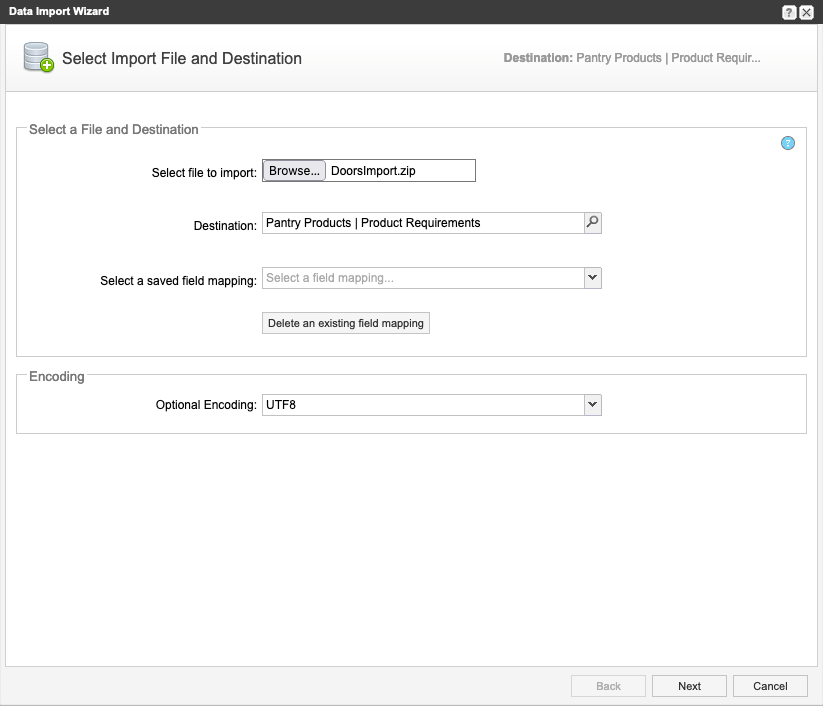
Select Choose File and select the DOORS file you want to import.
If the file type isn’t recognized, the import doesn't continue.
(Optional) Select a saved field mapping — Select previously created import configurations that were saved in the project for the same file type. This is helpful if you need to import multiple documents with the same field-mapping layout.
Optional Encoding — Select UTF8.
Complete the Choose Field Mappings for Import page, then select Next.
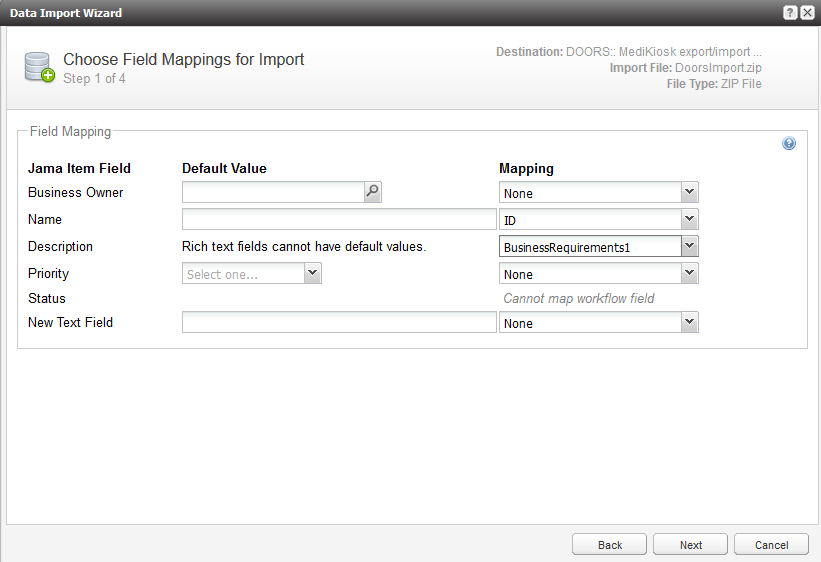
Field Mapping — Select a mapping for the Name field (this is usually the DOORS Object Identifier attribute). You can assign a default value for other Jama Connect fields and select which DOORS attributes you want to map to each.
Important
The Description field is usually mapped to the Main attribute in DOORS. Bullets and other symbols are exported from DOORS as images, not as formatting. If you're mapping a field that contains images or formatting, the corresponding import field must be configured as a rich text field, otherwise these images don't appear.
You can't select a mapping for Step action, Step expected results, or Step notes.
Select the options you want for hierarchy and relationships, then select Next.
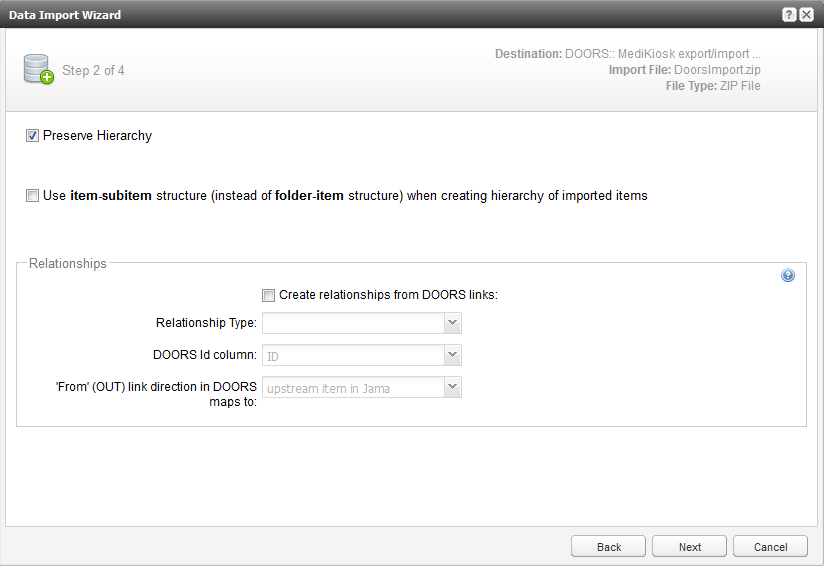
Preserve hierarchy — Select to keep the DOORS hierarchy when importing. If left unselected, the resulting items are at the same level.
Use item/sub-item structure — Select if you want all parent items to keep the item type of their children. If left unselected, all parent items become folders.
Important
All items converted to folders lose their relationships (links). If you're importing relationships, use the item or child-item structure.
Create relationships from DOORS links — Select to migrate Trace Links from DOORS to relationships in Jama Connect.
If you see the following error, check that you successfully completed all Jama Connect prerequisites before import.
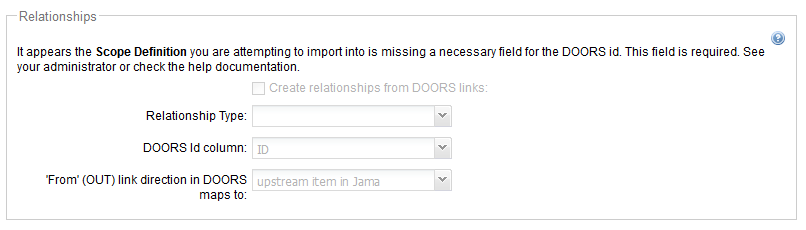
Relationship type — Select the type of relationship you want to create. If left unselected, this value is set to your organization's default value.
DOORS ID column — Select the name of the column from your export that contains the DOORS Object Identifier, which is used as the identifier when creating relationships. It must match between item types.
'From' (OUT) link direction in DOORS maps to — Set OUT=upstream or OUT=downstream. DOORS and Jama Connect use different terminology for relationship direction. The selection depends on how relationships are used in DOORS. Check the HTML file or run a test import to verify that this works as expected.
Important
Because relationships are created based on the DOORS Object Identifier, importing items twice creates multiple relationships.
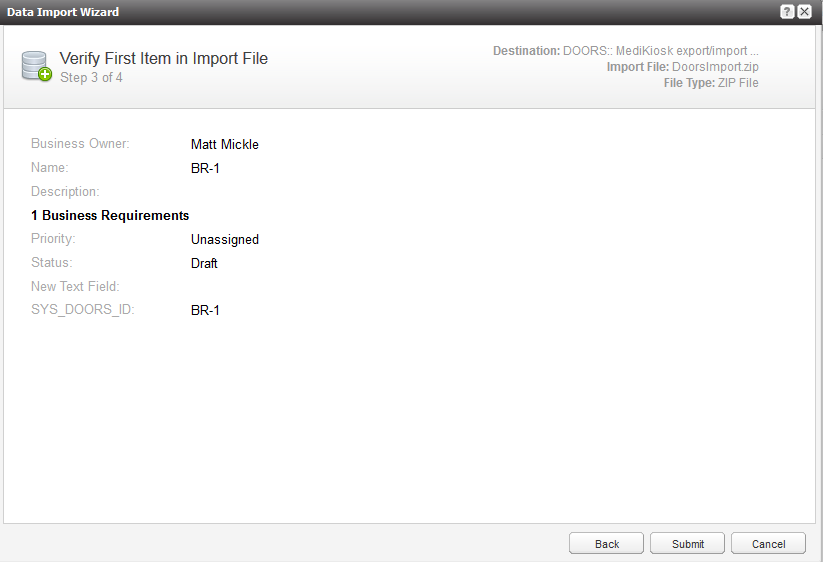
If the fields were mapped successfully, you see a preview of your import. Verify that it looks correct, then select Submit to import all items.
The Final Import Summary page confirms the total number of items imported.
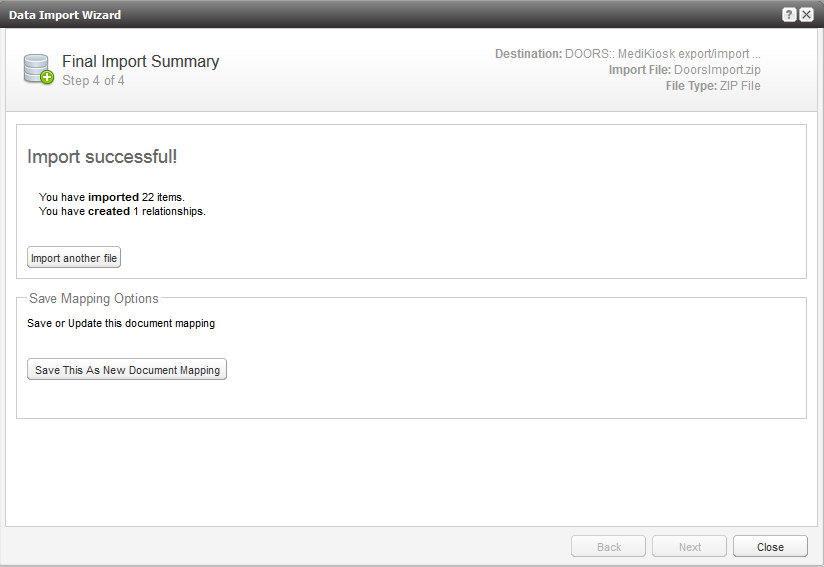
(Optional) Import another DOORS Module.
(Optional) If you plan on importing the same item type (objects) with the same mappings multiple times, you can save your mapping changes as a new document mapping here.
Select Close.
The DOORS files are now imported to Jama Connect.