Setting hierarchy with heading styles
When importing items from a Word document, you must prepare the document so that the import is successful. An important step in this preparation is to set the hierarchy, how items are nested in Jama Connect.
To set the hierarchy, use Word heading styles. Each heading represents a new item in Jama Connect. The heading text is imported into the item’s Name field and any paragraph text, tables, or images are imported into the Description field.

Note
In your Word document, all headings are imported as items, never as folders. However, the item hierarchy can be converted to folders after import using the Convert function.
Jama Connect supports up to six levels of headings in Word. Any levels beyond that are included in the text of the sixth level item.
The hierarchy of imported items is determined by which heading level you apply to the item name. A nested heading in Word is treated as a child item in Jama Connect, with a maximum of seven levels.
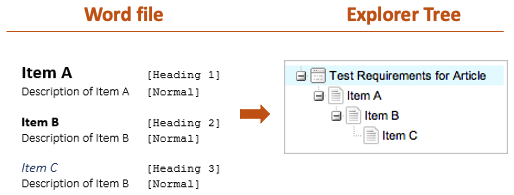
For example, in this diagram, Item A uses Heading 1 and is imported as a parent item. Item B uses Heading 2 and is imported as a child of Item A, and Item C uses Heading 3 and is imported as a child of Item B.

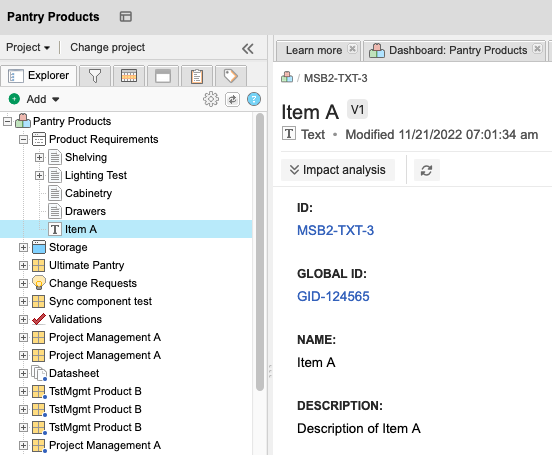
When you open the imported item in Single Item View, the Name field is populated with the text of the Word heading, and the Description field is populated with the text of the Normal style paragraph.

Note
For the Description and rich text fields, formatting for bullets, bold, italic, and underlining are retained when imported. Numbered lists are imported as bullets. When a list contains multiple levels, Jama Connect continues to use bullets. However, each set is indented to indicate the original level.