Convert items in List View or Explorer Tree
You can use the drop-down menu in List View or the Explorer Tree to convert items or sets.
Tip
Before converting items, read about how conversions work in Jama Connect.
To convert items in List View or Explorer Tree:
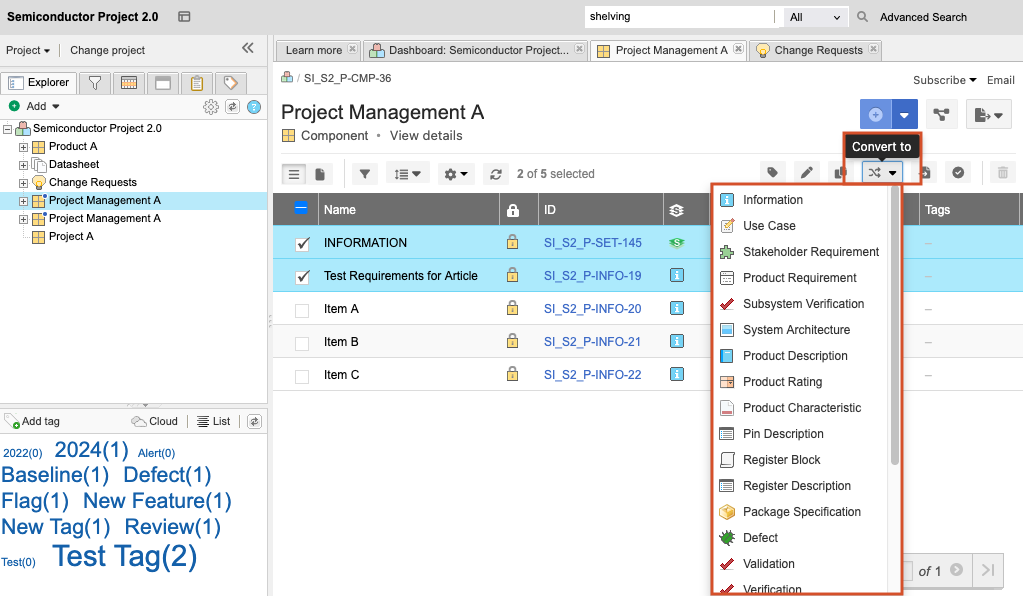
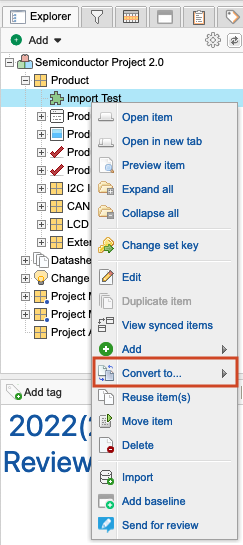
In List View or the Explorer Tree, select the items you want to convert, select Convert to, then select an item type from the list that appears.
List View — Select the checkbox for the item or set.
Explorer Tree — Select an item or set.
The Review Item Conversion window highlights in white the fields that are copied into the new item type.
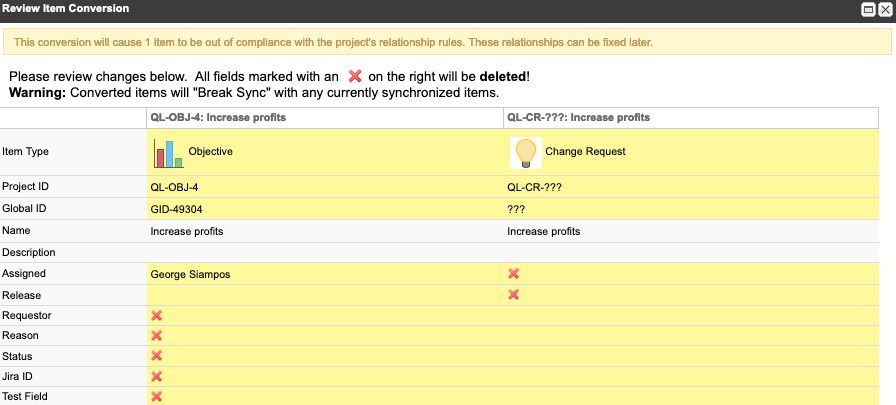
Select Next to view each page of the Review Item Conversion window.
If converting an item to a folder, select Recursively convert all items with Children to Folders. Parent items at every level beneath the item being converted are converted to a folder.
This option appears only when you select a folder to be converted.
Select Convert.
If the item can belong in its current location (such as a text item), it remains there. However, sets can't contain mixed item types, so the item might need to be moved.
If prompted to move an item, select the new location for that item, then choose Select & Close.
Note
If you select multiple items in List View, you must also specify a location, even if it's the items' original location. Doing this ensures that the items end up in the correct place.
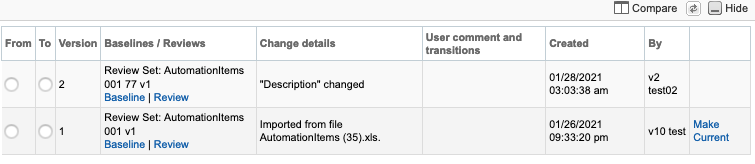
The changes are visible when you select Versions in the side toolbar of Single Item View, then open the item's version tab.