Execute a test run
When a user executes a test run, results like Pass/Fail are captured for that run. The run displays details for conducting the run, including the description and steps defined in the associated test case.
Important
When you select Pause, the results (Pass/Fail) aren't automatically saved. You must select Save and Done to save the recorded results or "actual results" values.
When a test run is locked, it can't be synced to test cases, edited, executed, or deleted.
To execute a test run:
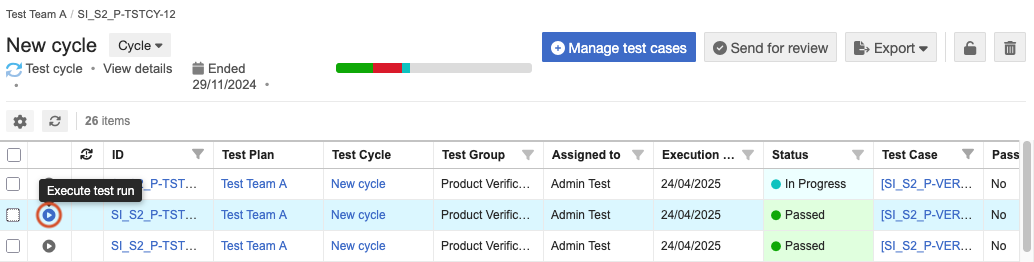
In the test plan, select Execute this Test Run (blue arrow button) next to the run you want.
The Execute Test window includes three tabs at the top: Test Execution, Test Run Details, and Test Case.
Note
If you try to execute a test run that isn't assigned to you, you are prompted to reassign it to yourself.
To execute multiple runs assigned to you, make sure they are assigned to you before opening the Execute Test window, then select Open my next assigned test to continue to the next run.

Select the Test Execution tab.
Select Start Test Run to start the duration timer.
Unless the field is configured to read-only, you can select the duration field and change the timer to reflect the actual testing time.
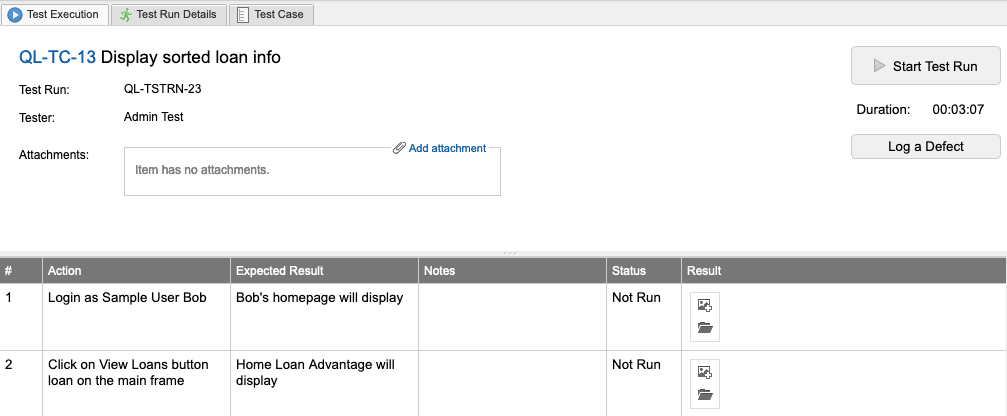
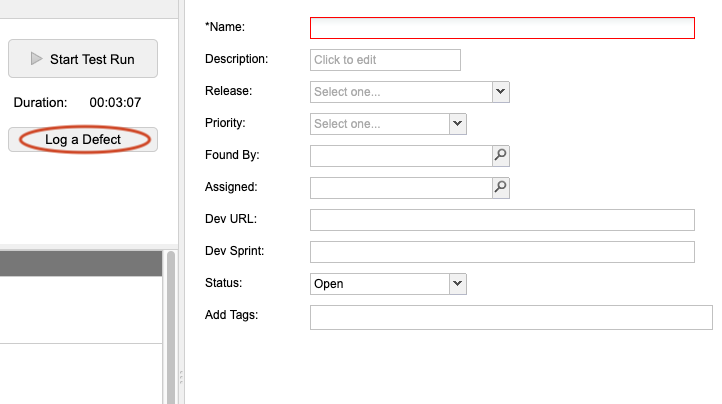
If you discover a defect while running a test, select Log a Defect to open the right panel, fill in the information and select Save Defect. (A project admin can determine where these defects are saved.) When you add a defect from the Test Execution window, it's automatically related to that test run and test case where the test run was generated.
Once you start the timer and begin the test, mark each step as passed, failed, or not applicable*. You can add results for each step in the results field. If there are no steps, you can assign an overall passed, failed, or not applicable status*.
* Not applicable status is only available when configured by an organization admin.
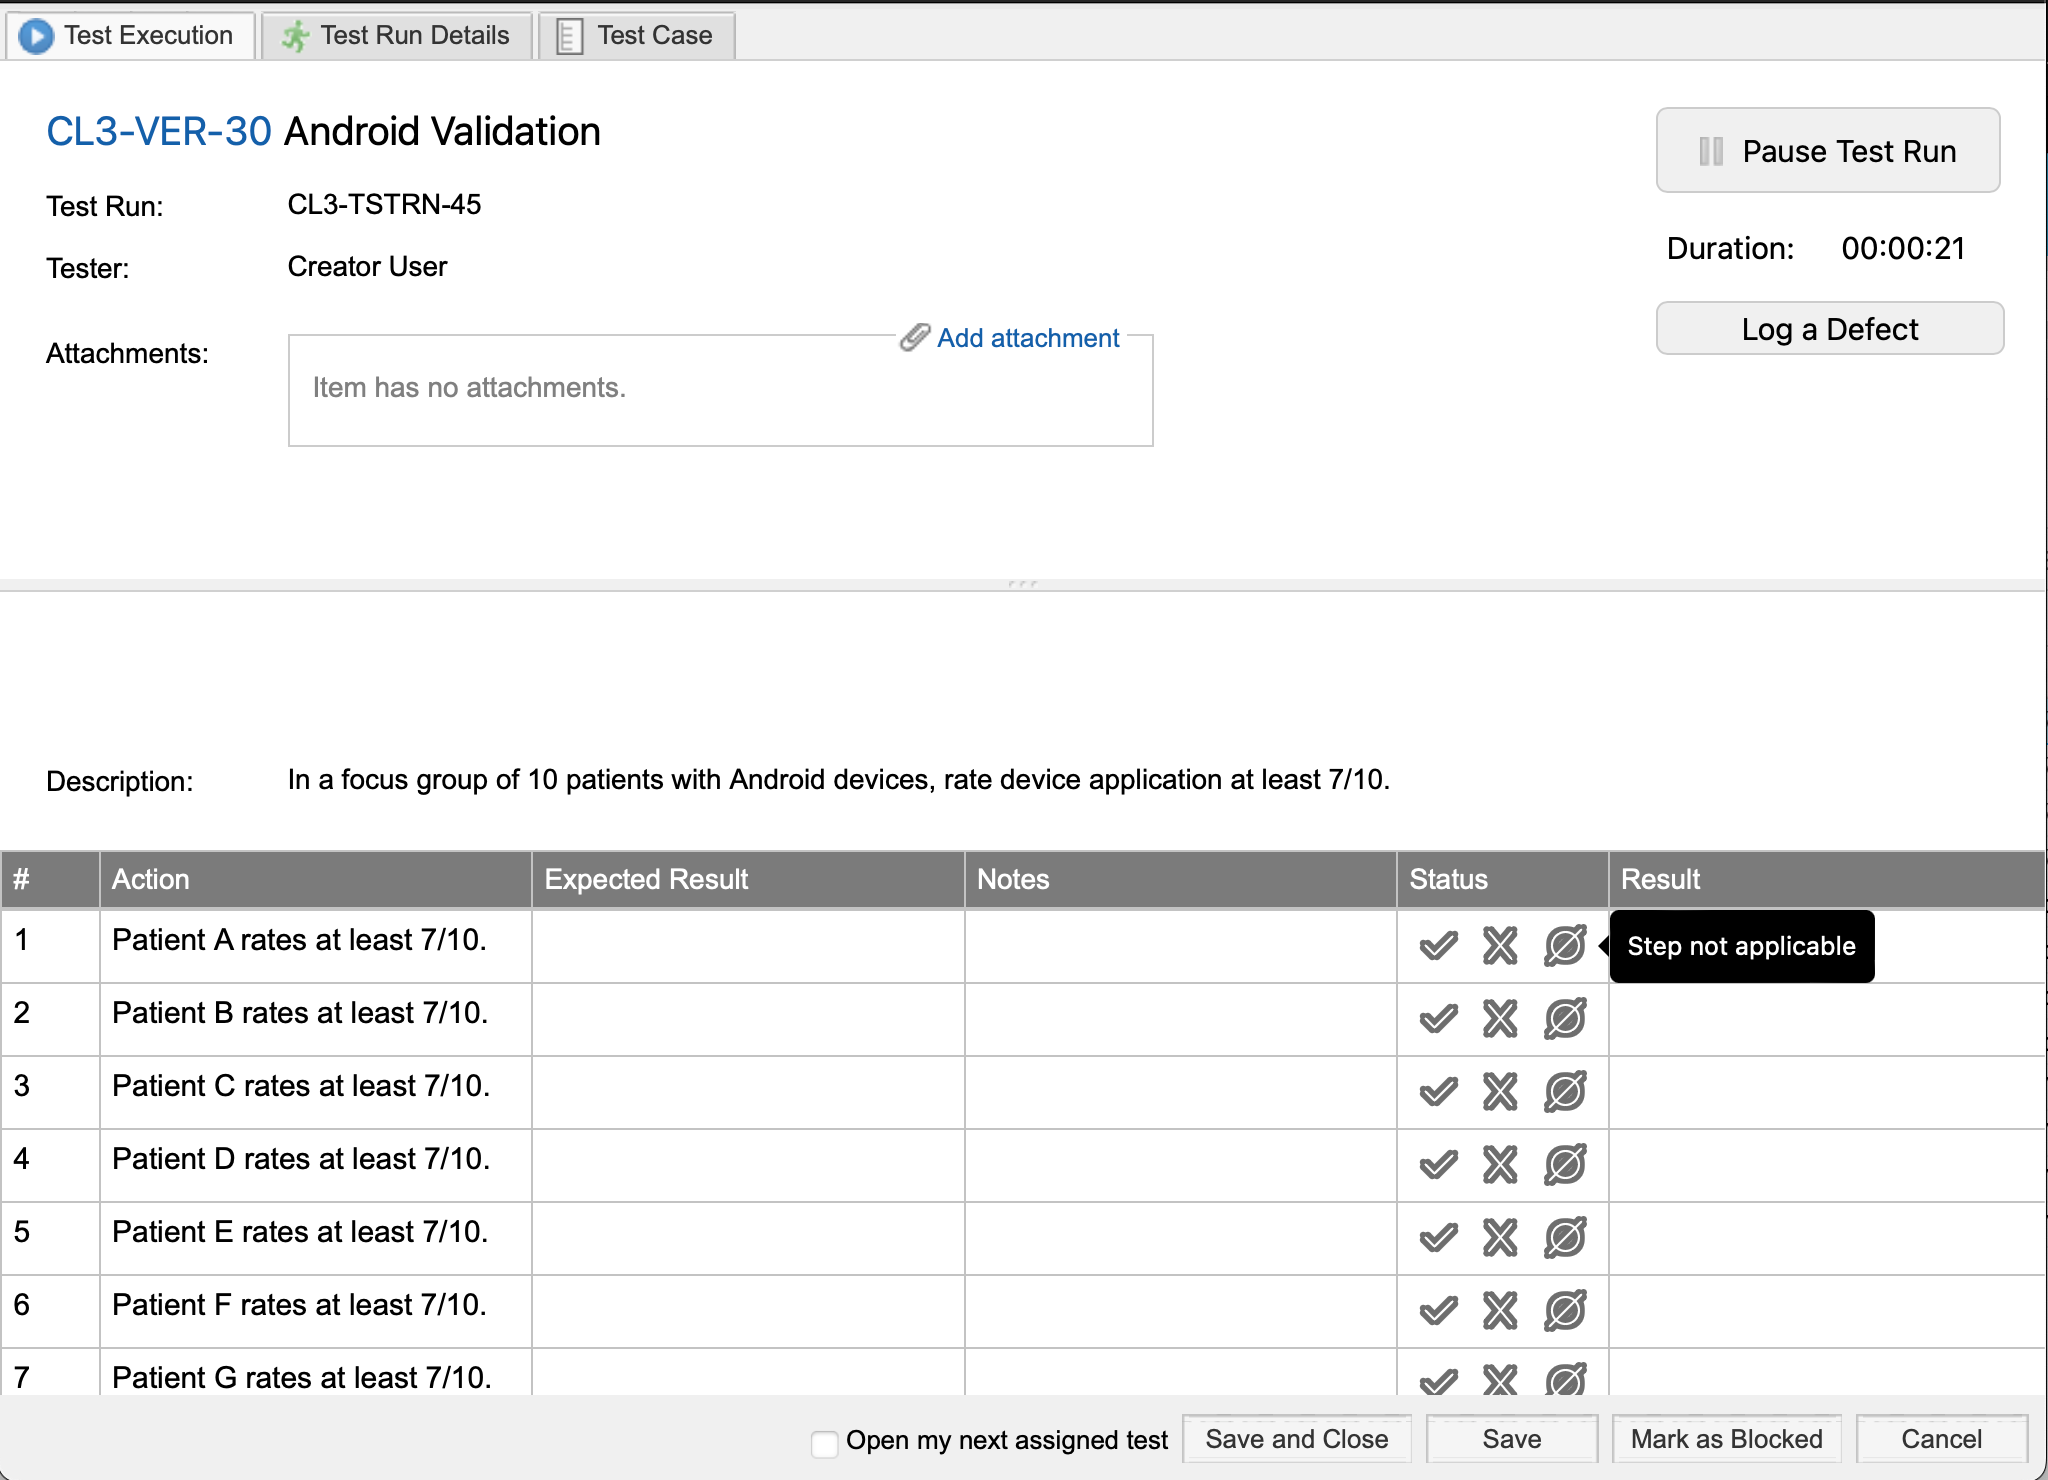
To include images in the Results column of the test steps, select Add Image. You can also provide feedback for the test run as a whole using the Actual Results field, which is a rich text field that can include formatted text, tables, images, and links.
The test run status (in progress, passed, failed, blocked) is shown at the bottom of the status column.
(Optional) If any step failed but you want to conditionally pass the test run, select Pass with errors. If the test run couldn’t be executed (steps couldn’t be performed), select Mark as blocked.
Select the Test Run Details tab to view details about the run.
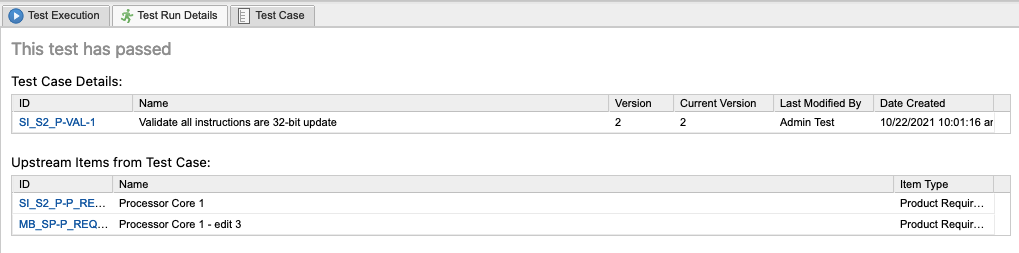
These items are visible:
Test case that generated this test run — View the version number of the test case at the time the test run was generated and the current version. Select the ID to open a new window that displays the details of the derived item, such as the goal of the test case, preconditions, steps in the case, and the duration of the test run.
Upstream items related to this test run — Select the item ID to view detailed information about the related items in a separate window.
Select the Test Case tab to view details about the test case that generated this test run.

Select Save and Close.
The window closes and your changes are saved.