Import a Word file
You can import data from a Word file to Jama Connect using the Data Import Wizard, which walks you through the process.
To import a Word file:
Make sure your Word file has been prepared for a successful import.
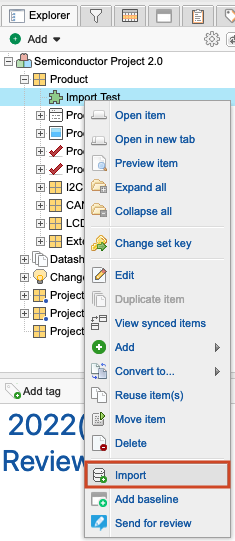
Open the Data Import Wizard: In the Explorer Tree, select an item where you want to import new items, then select Import. Your file is imported below the selected item.
The first page of the wizard opens with the Destination field pre-populated.
Complete the Select Import File and Destination page, then select Next.
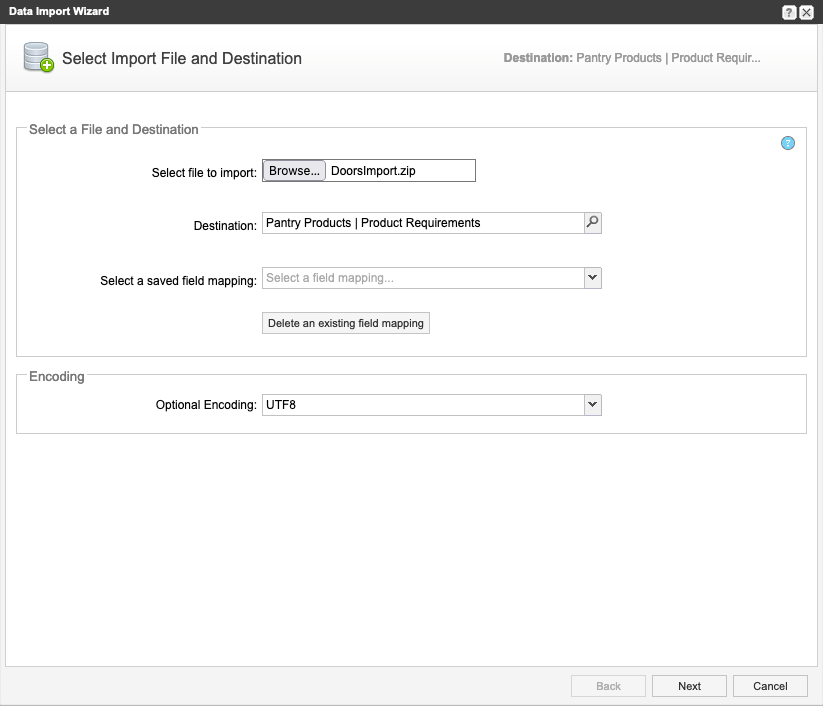
Select Choose File and select the Word file you want to import.
If the file type isn’t recognized, the import doesn't continue.
Tip
If you previously saved your field mappings for importing a Word file, choose the field Select a saved field mapping and select that file. This is useful if you are importing multiple documents with the same field mapping.
(Optional) In the Encoding section, select the character set encoding to use during the import. For most imports you can use the default, UTF-8, which is used by the Jama Connect database.
Complete the Choose Field Mappings for Import page, then select Next.
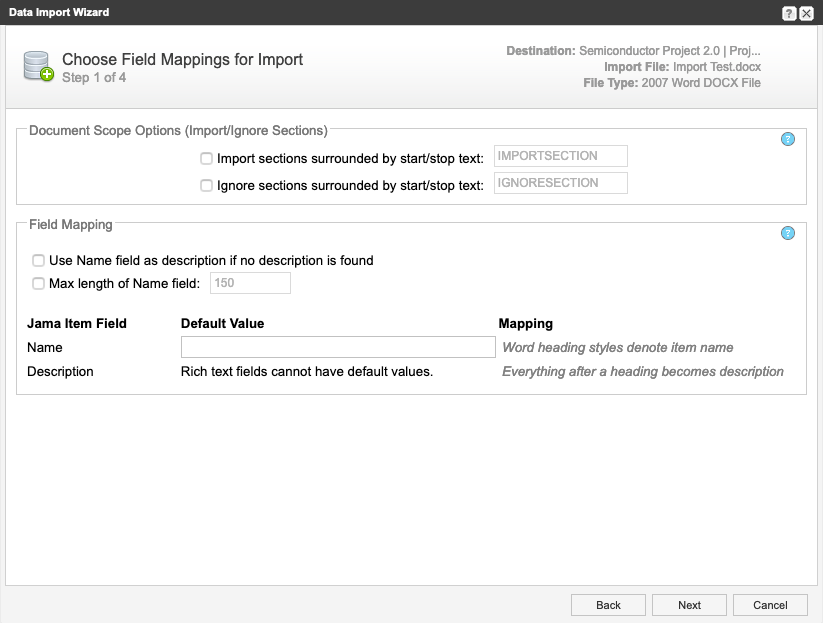
Document Scope Options — If you tagged your Word file to import and ignore some sections, select the checkboxes and enter the name of each keyword (for example, INCLUDESECTION and IMPORTSECTION).
Field Mapping
Max length of Name field — Select this and enter a maximum number of characters for the name. Default is 255 but this option lets you further limit the name length.
Default Value — Use this option (when available) if you want a field value to be used by default. Then, all items created during import include the default value you enter. For example, you can set the status to Draft for all imported items.
Complete the How to Handle Tables page, then select Next.
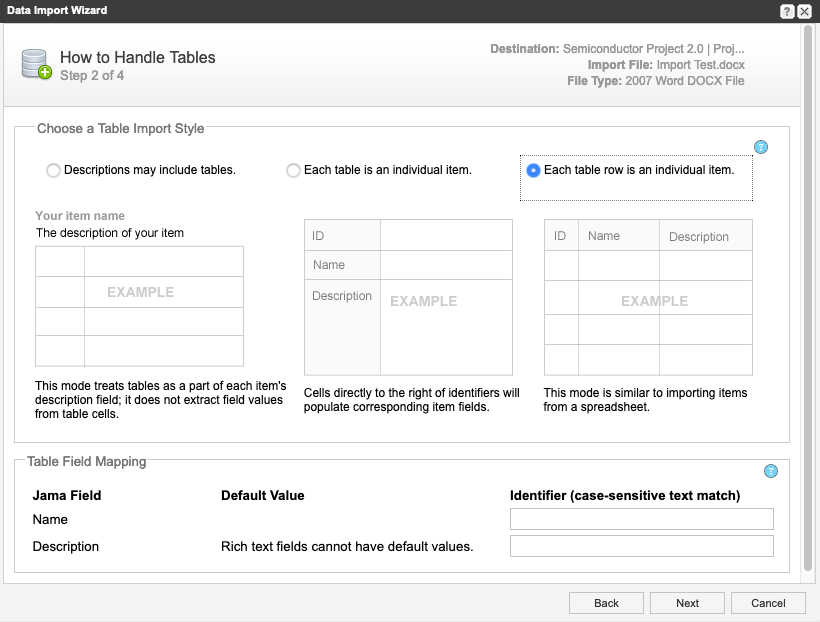
Choose a Table Import Style — Select this option if your item description includes tables:
Descriptions may include tables — Select this option if your file uses headings for hierarchy, but the content includes some tables.
Each table is an individual item — Select this option if your file uses tables and includes a separate table for each item. Must complete Table Field Mapping.
Each table row is an individual item — Select this option if your file uses tables and the tables use a separate row for each item. Must complete Table Field Mapping.
Table Field Mapping — Complete this section if importing table content as individual items (option 2 or 3 above). From your Word tables, copy the heading values into the Identifier field for each Jama Field mapping. For some Jama Fields, you can set a default value (for example, setting status to Draft), which populates the field if the mapping has no value.
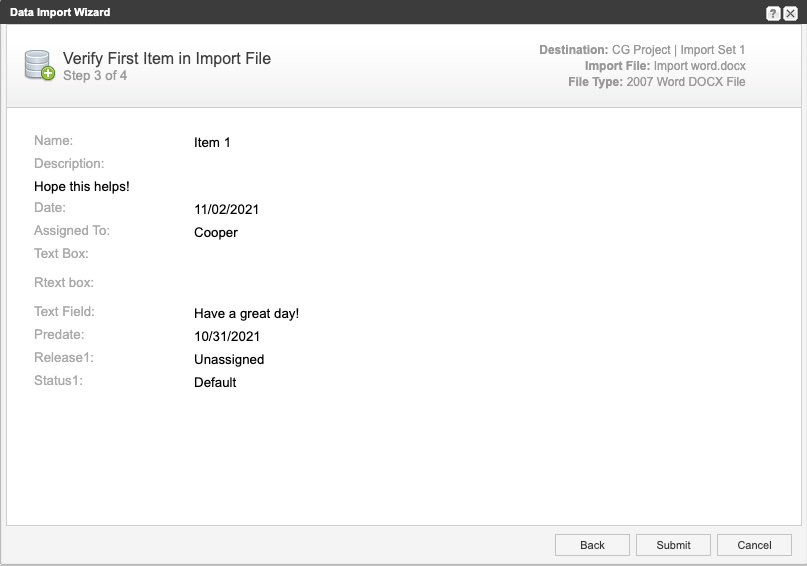
Verify First Item in Import File — Review the mapping of the first item found in the document you're importing. If the mapping is correct, select Submit to import the target document.
(Optional) Select Import another file to restart the wizard.
(Optional) To reuse the field mapping settings, select Save this as new document mapping.
Note
Field mappings are project-specific and can be used by any user in the project where the mappings are saved.
Select Submit.
Select Close.
A message appears in the Data Import Wizard to confirm that the import was successful.