Create a baseline manually
Create a baseline when you want to capture a snapshot of where items are at in that moment.
Note
You must have a creator license and read/write permissions to manually create a baseline.
Important considerations
Baselines are created automatically whenever anyone creates a review.
Project versioning must be enabled to be able to create a baseline.
All upstream and downstream relationship information from items included in the baseline scope is also included in the baseline snapshot, even if those upstream or downstream items aren't part of the baseline scope. This functionality is limited to relationship direction, item name, and item ID.
To create a baseline manually:
In the Explorer Tree, select the Baselines tab in the project where you want to create the baseline.
Add a baseline using one of these methods:
If the item already has a source, select the source and select Add baseline.
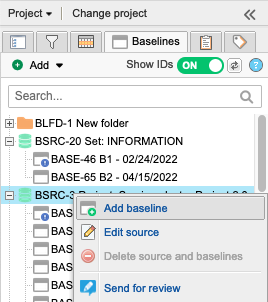
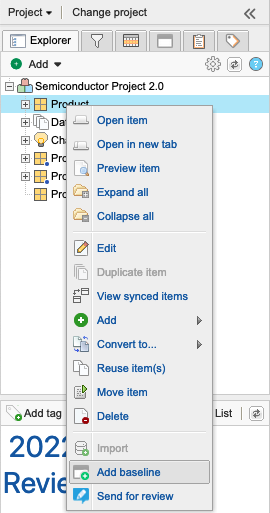
To create a baseline from the Project Explorer Tree, select a set, component, folder, or item.
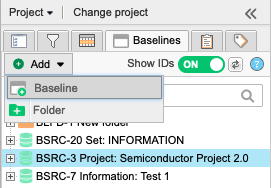
To choose items, select Add > Baseline from the top.
Note
If the items from an existing source were deleted, you can't add a new baseline from that source.
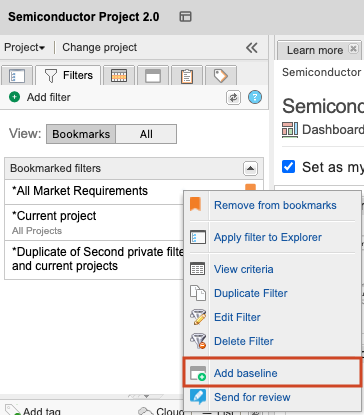
To create a baseline from a filter, select the Filters tab, select the filter, and select Add baseline.
In the window that opens, select a tab (Item selection, Releases, Filters) and select containers or individual items in that tab. You can select containers or individual items, but you can select from only one tab.
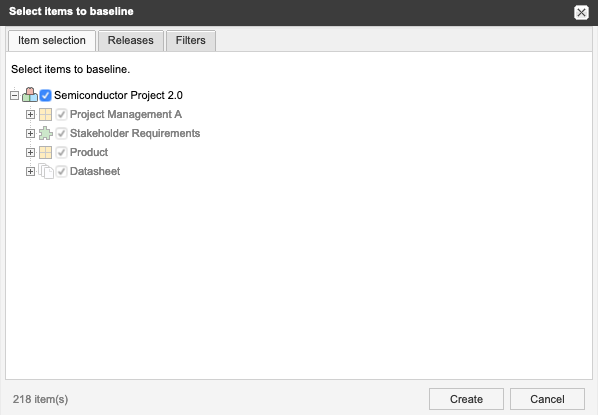
Select Create.
(Optional) Change the default name for the baseline and add a description.
You can update the pick list and rich text as needed. When the baseline pick list is updated, the activity is captured in the baseline and project activity streams.
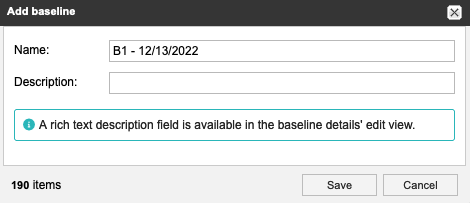
Select Save to create the baseline.
The new baseline is added to the tree under an existing source or at the top of the tree. Baselines are always listed in the order they were created.