Synchronize items from Synced Items window
Synchronization checks for differences between reused items and containers. When differences exist, you can update the corresponding information for those items or containers.
To sync item from the Synced Items window:
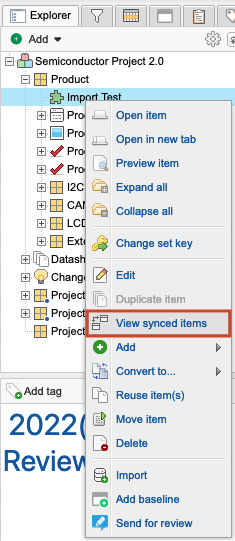
Open the Sync Items window: In the Explorer Tree, select the item, component, or set you want to sync, then select View synced items.
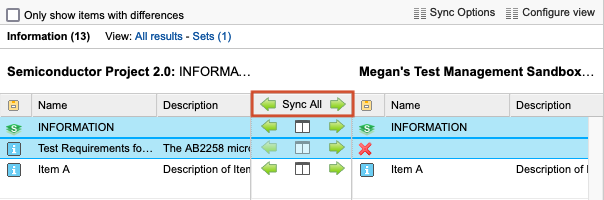
Select Sync All to open the window for all displayed items or use the up or down arrow to sync changes to or from the displayed items.
Select Compare to open the Compare View, then use one of these synch methods:
One item — Use the right or left arrow for each item to sync it in a particular direction.
Multiple items — Select multiple items (highlighted in blue) with the Ctrl+Shift keys, then use the arrows at the top of the Sync All column to synchronize all items in one direction.
Important
When you synchronize an item, a new version of that item is created. If the sync was done by mistake, it can’t be undone but you can make the prior version current. This applies to field updates only, not to relationships created or new items created.
(Optional) The Batch Sync window displays the selected number of items to update, with Selected Items chosen by default. If needed, select All Items.
Select Batch Sync to complete the update.
Sync items — Only fields that are enabled as synchronized fields are updated. Child items are added to the destination if they exist in the source only.
Sync a container — The container and all children are synced unless you created advanced reuse rules that specify otherwise.
The update is complete.